Via kubectl
Step 1: Navigate to Cluster Orchestrator in the Cloud Costs Module
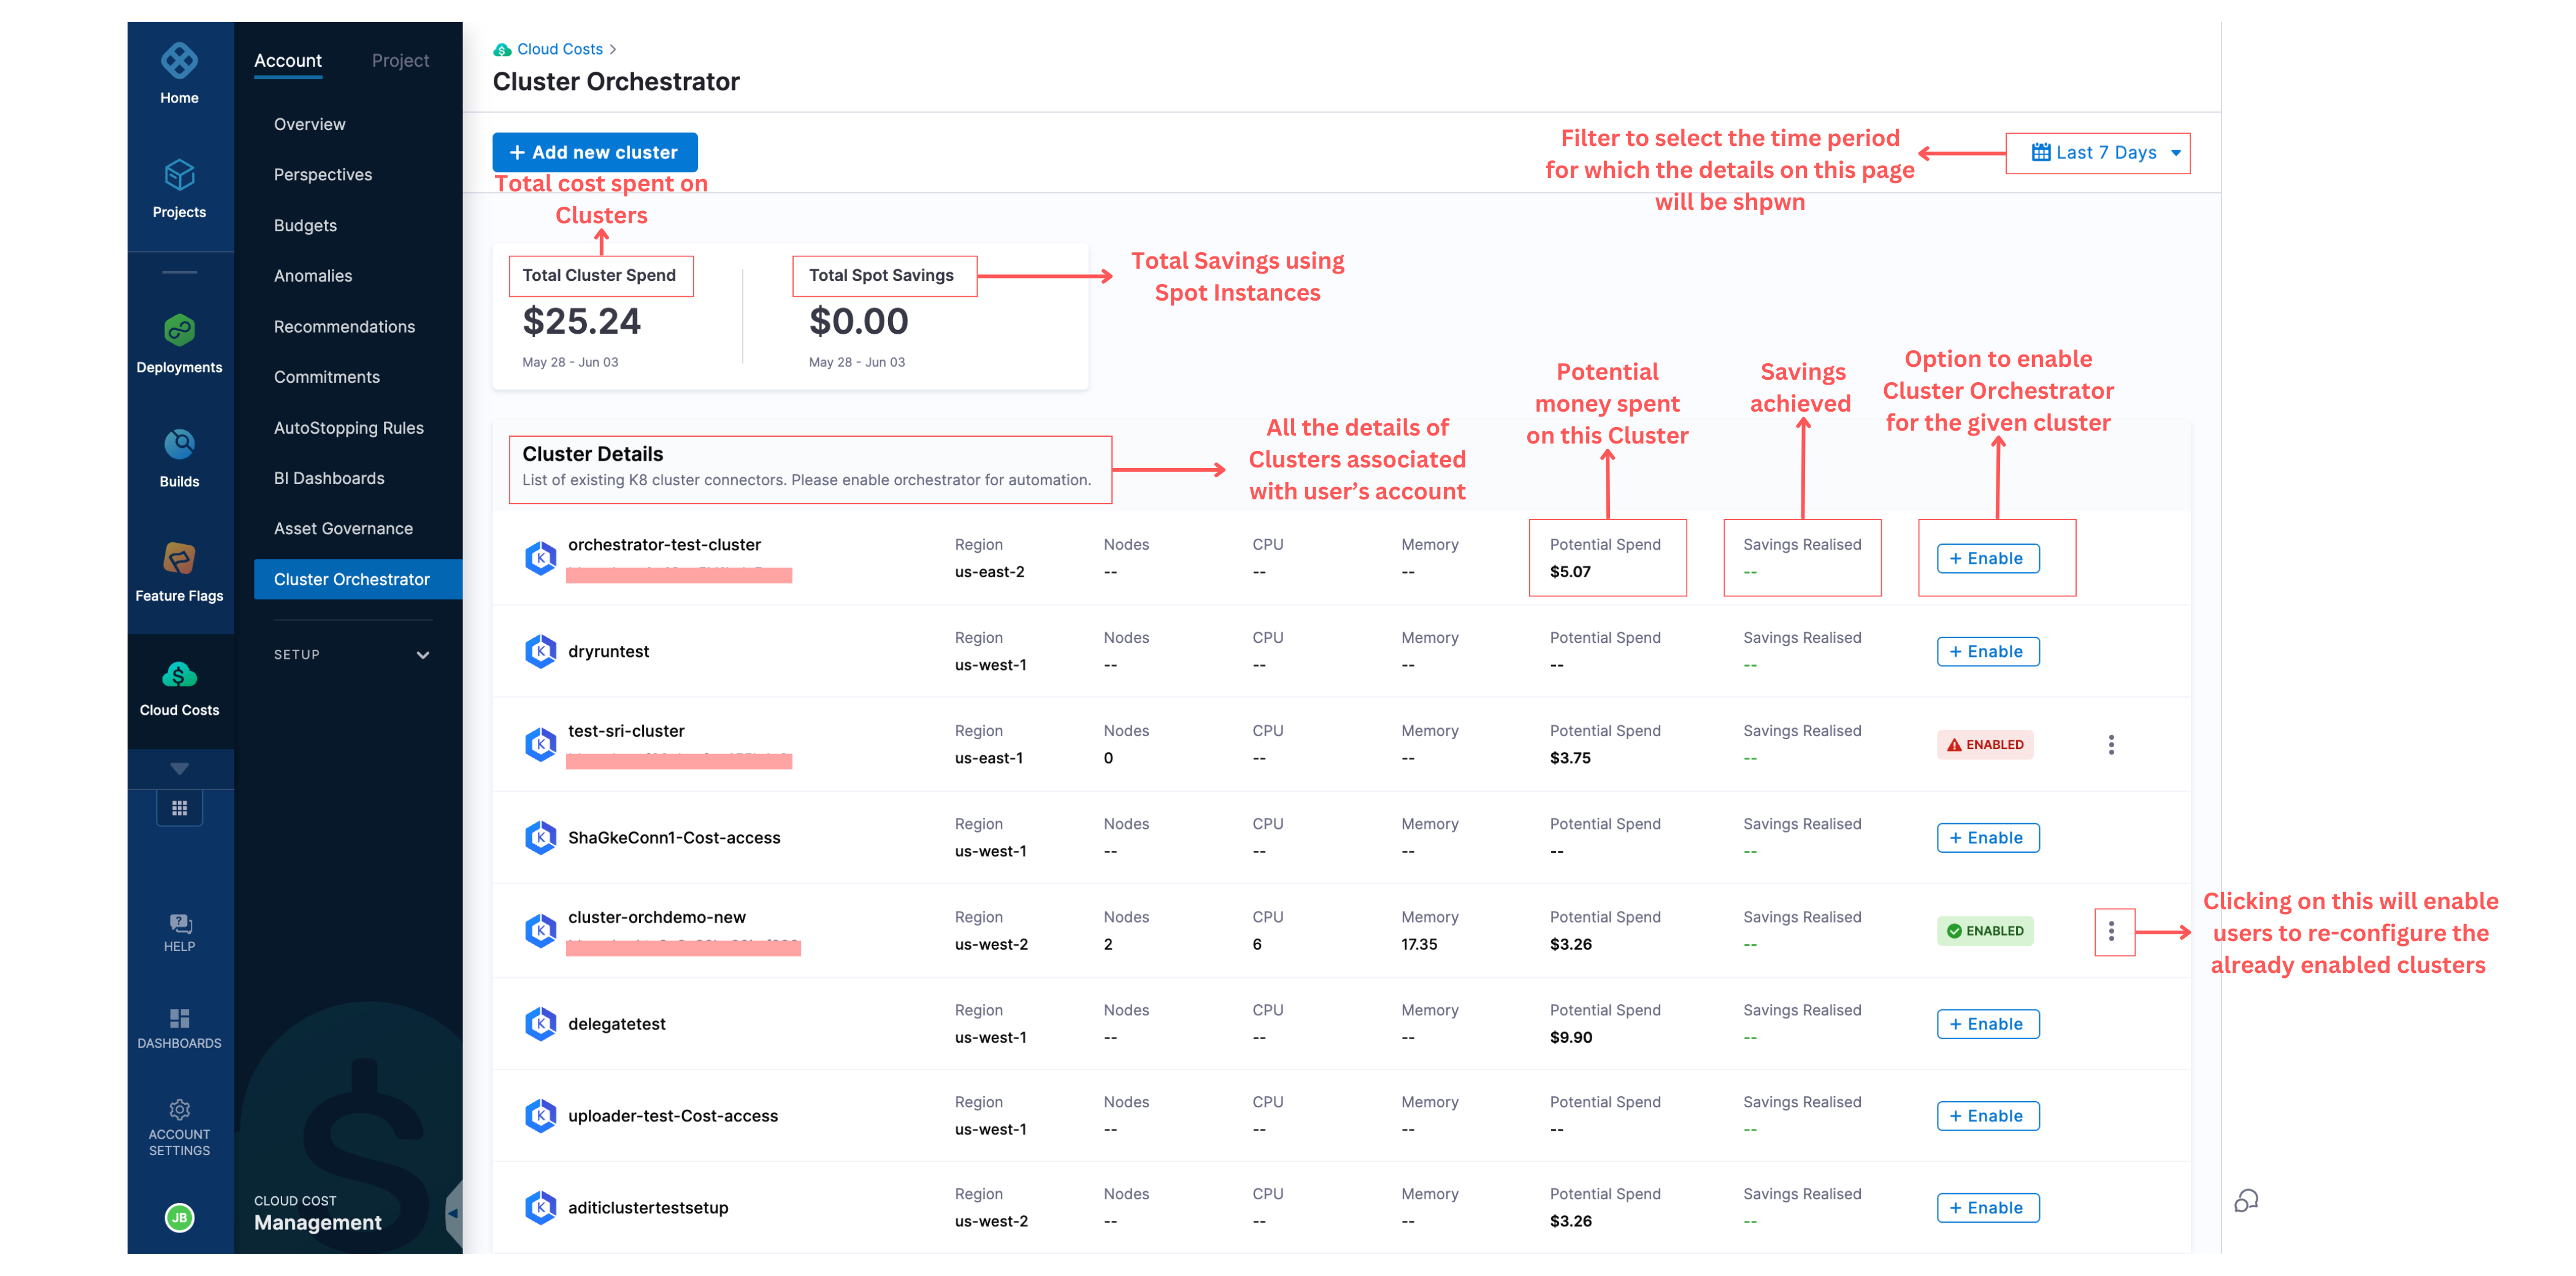
Click on Cluster Orchestrator from the navigation bar. Once you click on it, you will be taken to the home page, where you can see all the clusters associated with your account.
For each cluster, you can see the following information:
- Name of the cluster
- Region of the cluster
- Number of nodes associated with the cluster
- CPU
- Memory
- Potential spend of the cluster
- Savings realized
- Whether the Cluster Orchestrator is enabled for the particular cluster
On this page, you can also see the total cost of the clusters and the spot savings.
Step 2: Enable the Cluster Orchestrator for a Selected Cluster
For a given cluster, click on the enable option, which will take you to the enablement screen. To enable the Cluster Orchestrator for the particular cluster, there are two steps to complete:
Step A: Cluster Permissions
You will be asked to run a shell script in your terminal and verify the connection. Upon successfully establishing the connection, click on the next step to configure.
Step B: Orchestrator Configuration
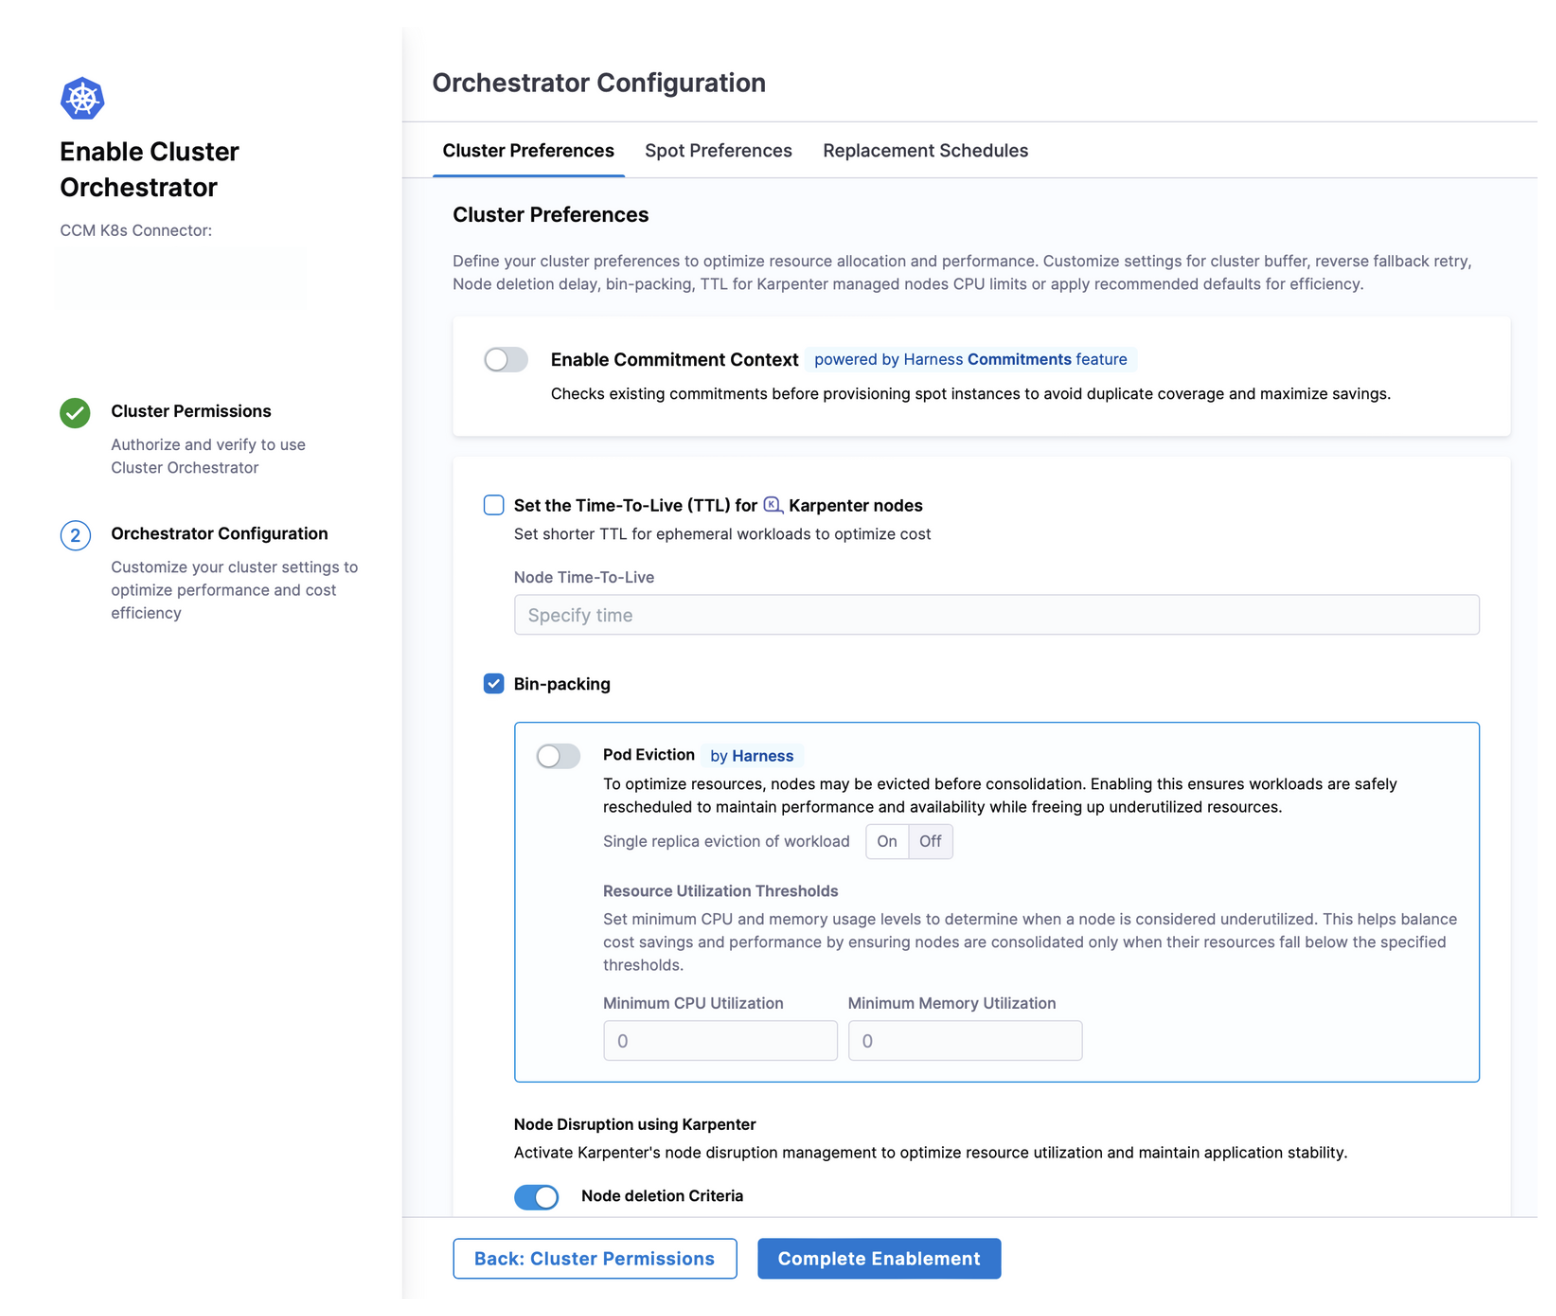
Cluster Preferences
-
Enable Commitment Context (Inegration with Commitment Orchestrator): Checks existing commitments before provisioning spot instances to avoid duplicate coverage and maximize savings.
-
Set the Time-To-Live (TTL) for Karpenter nodes: The Time-to-Live (TTL) setting for Karpenter nodes defines the maximum lifespan of a node before it is eligible for deletion, regardless of its resource utilization. By setting a TTL, users can ensure that idle or unnecessary nodes are automatically cleaned up after a specified time period, even if they are not underutilized or empty. This helps in avoiding resource sprawl, ensuring that unused nodes don’t linger indefinitely, and optimizing the overall cost and resource usage within the cluster.
-
Bin-Packing:
-
Pod Eviction by Harness: To optimize resources, nodes may be evicted before consolidation. Enabling pod eviction ensures workloads are safely rescheduled to maintain performance and availability while freeing up underutilized resources. Users can set single replica eviction of workload as On or Off.
-
Resource Utilization Thresholds: This is used to set minimum CPU and memory usage levels to determine when a node is considered underutilized. This helps balance cost savings and performance by ensuring nodes are consolidated only when their resources fall below the specified thresholds.
-
-
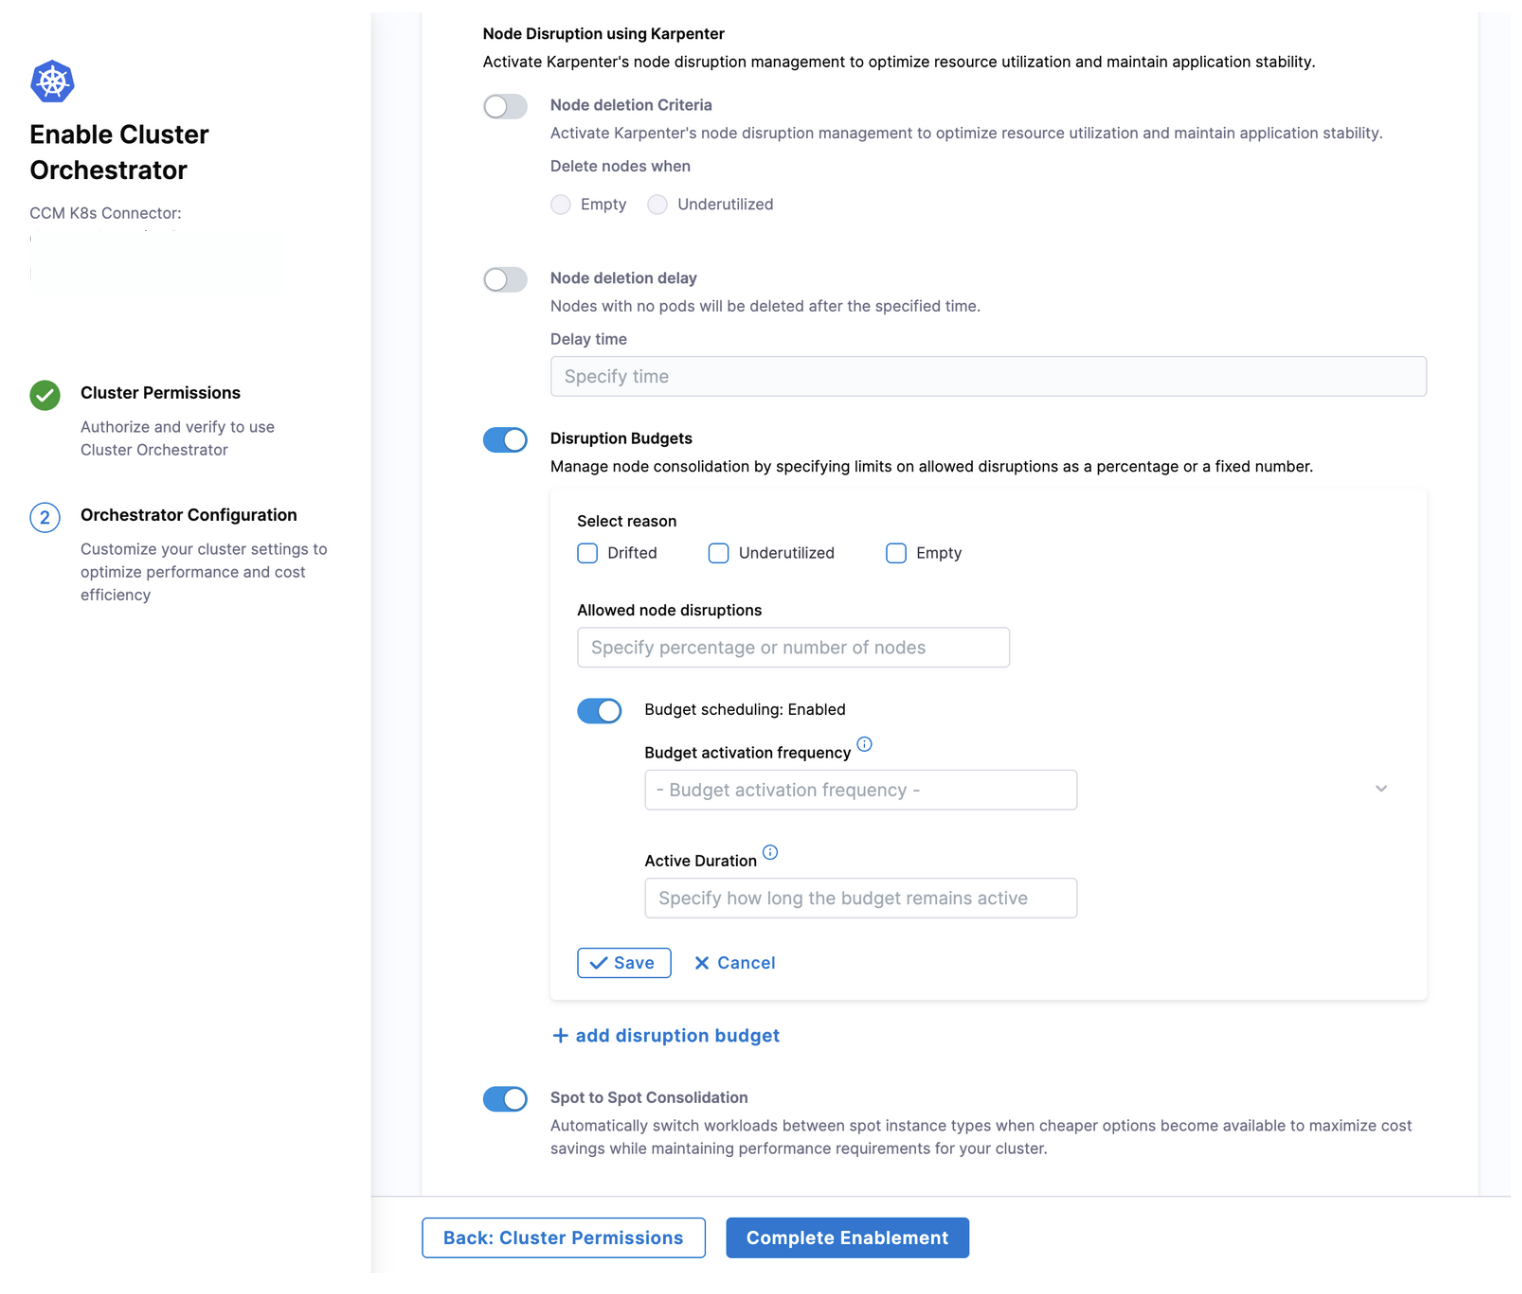
Node Disruption Using Karpenter: This option can be utilised to activate Karpenter's node disruption management to optimize resource utilization and maintain application stability. Cluster orchestrator provders three optional settings here:
- Node deletion criteria: The setting ensures that the nodes are deleted either when they are empty or under utilised as set by the user
- Node deletion delay: The setting ensures that the nodes with no pods are deleted after a specified time and the delay time can be set by the user
- Disruption Budgets: This feature allows users to define limits on the percentage of nodes that can be disrupted at any given time. This option comes with an added setting of selecting the reason and enabling or disabling budget scheduling
-
Spot to Spot Consolidation: Automatically switch workloads between spot instance types when cheaper options become available to maximize cost savings while maintaining performance requirements for your cluster.
Spot Preferences
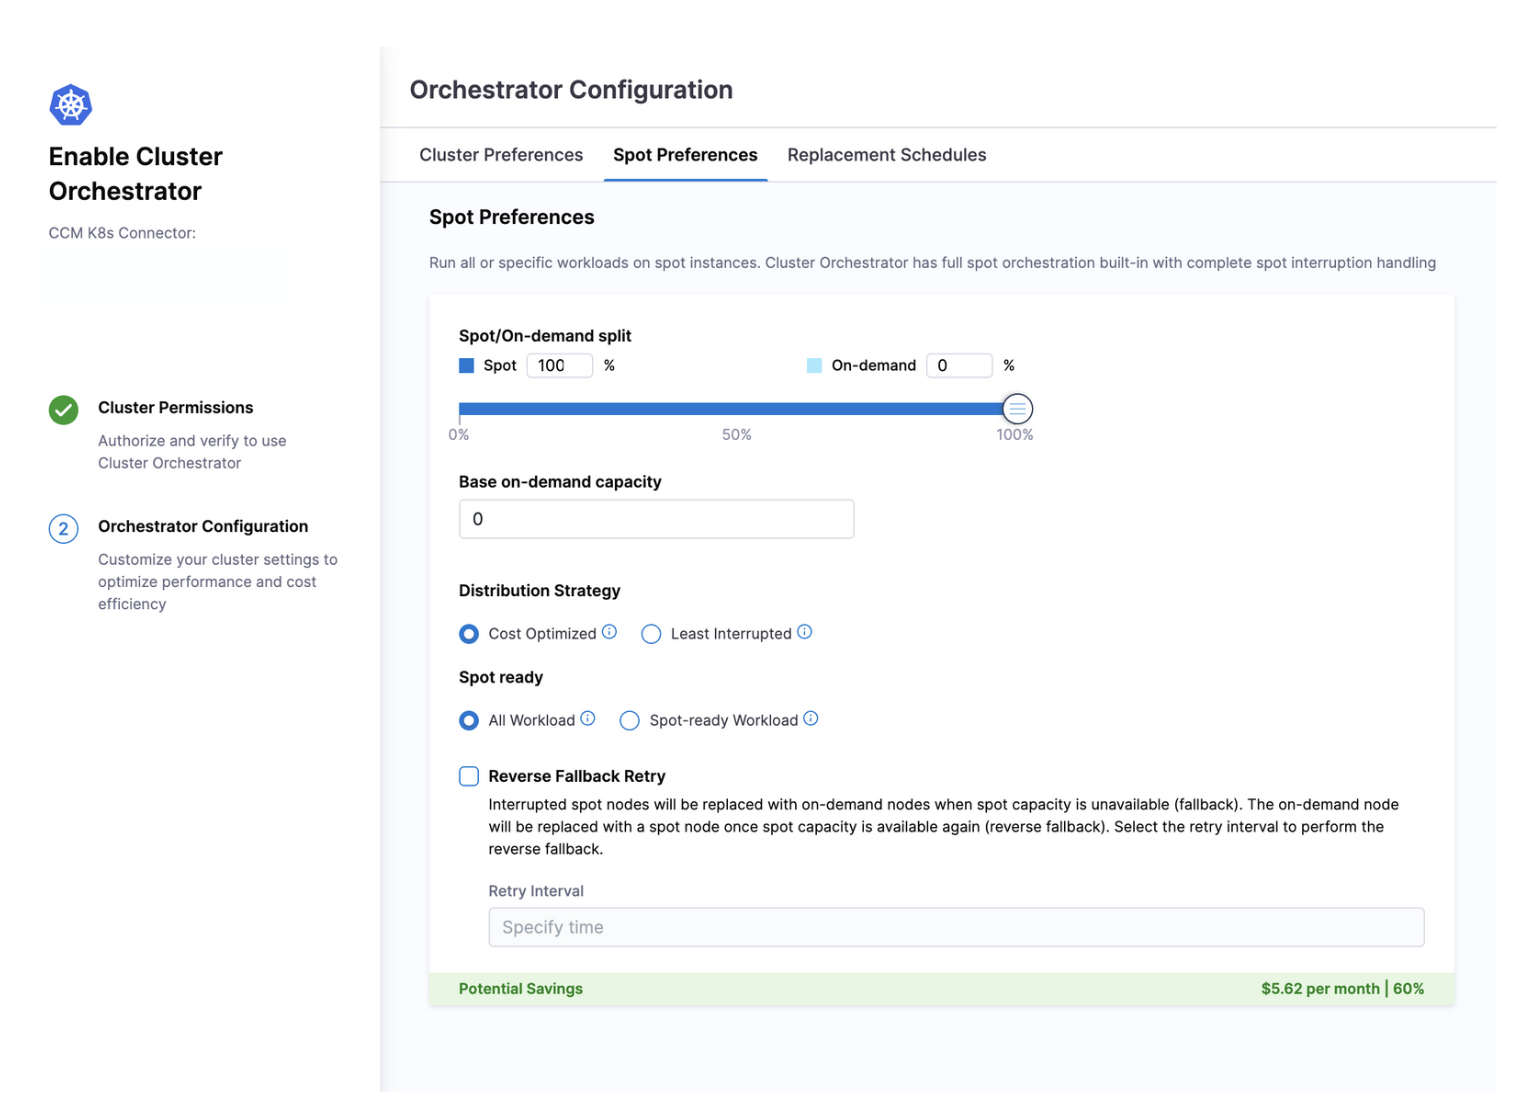
Cluster Orchestrator allows users to set Base On-Demand Capacity, which can be further split into percentages to determine how much should be used by Spot and On-Demand instances. You can also choose the distribution strategy between Least-Interrupted or Cost-optimized and can define spot-ready for all workloads or spot-ready workloads.
Users can also enable reverse fallback retry. When spot nodes are interrupted, they are automatically replaced with on-demand nodes to maintain application stability. Once spot capacity becomes available again, the system will perform a reverse fallback, replacing the on-demand node with a spot node. Users can select the retry interval to define how often the system checks for spot capacity and performs the reverse fallback.
Replacement Schedules
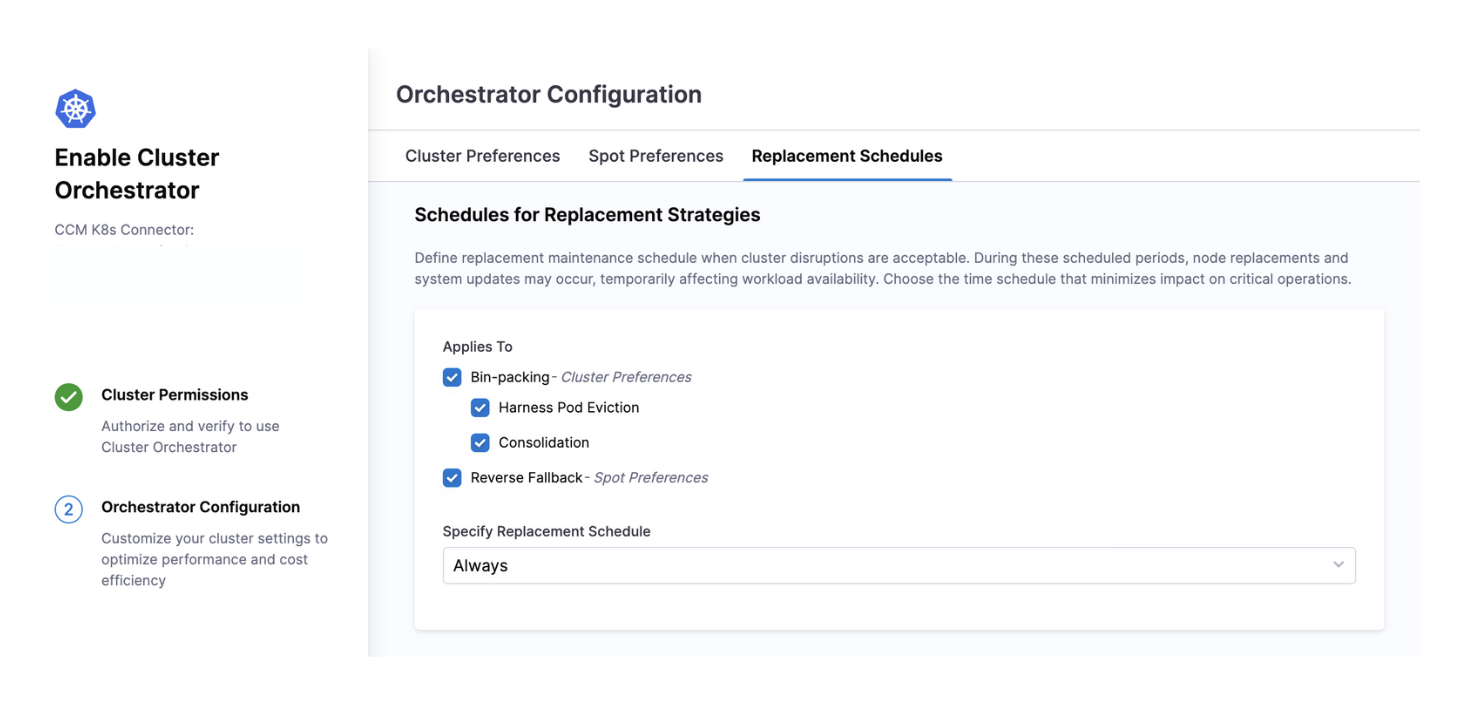
Define precise time windows when cluster disruptions are acceptable for maintenance operations. During these scheduled periods, Cluster Orchestrator performs node replacements, consolidations, and system updates that might temporarily affect workload availability.
Schedule Options:
-
Custom Schedule: Define specific days and time windows when maintenance can occur (e.g., weekends, off-hours, or maintenance windows aligned with your business cycle). This gives you complete control over when potentially disruptive operations take place.
-
Always Available: Maintenance operations can occur at any time, prioritizing cost savings and efficiency over potential disruption. Best for non-production environments or systems with built-in resilience.
-
Never: Disables automatic maintenance operations completely. All changes require manual intervention. Use this for highly sensitive production workloads where any disruption is unacceptable.
Operations Governed by Schedules:
-
Bin-packing Operations:
- Harness Pod Eviction: Controls when pods can be evicted from nodes to facilitate consolidation
- Node Consolidation: Determines when underutilized nodes can be drained and removed
-
Spot Instance Management:
- Reverse Fallback: Schedules when on-demand instances can be replaced with spot instances after spot capacity becomes available again
- Spot Preference Application: Controls when spot instance preferences and distribution strategies are applied